Getting started
Sign in, create your business, add a shop, invite your team and make your first sale.
This page takes you from a new account to your first sale. It takes about ten minutes.
#Sign in
LiteShop has no separate password. You sign in with your Google or Facebook account.
When to use: the first time you open LiteShop, and on every new phone or computer.
- Open https://pos.liteshop.app, or open the LiteShop app.
- Tap Continue with Google (or Continue with Facebook, where it is shown).
- Choose your account and allow the sign-in.
- In the Windows app, your web browser opens. Sign in there, then come back to LiteShop.
#Create your business
Your business (company) holds all your shops, items, customers and sales. You create it once.
When to use: right after your first sign-in, if nobody has invited you.
- On Create your LiteShop space, type your Company name. Customers see it on receipts.
- Check the Currency, for example
MMK. - Check the Timezone (IANA). It is filled in for you. In Myanmar choose
Asia/Yangon. - Tap Launch LiteShop.
#Setup questions
Right after you create your business, LiteShop asks a few questions so it only shows the tools your shop needs.
When to use: once, after Launch LiteShop. You can answer again any time in Settings → Features.
- What do you sell? Pick the closest: General retail, Grocery, Clothing, Phones & electronics, Pharmacy, Digital codes & top-ups or Other.
- Answer Yes or No: Do you deliver?, Do you sell online?, Do you sell on credit?, Do you sell by weight?, Do you repair or service customers’ things?, More than one shop?
- Pick How many staff?: Just me, 2–5 people or 6 or more.
- Tap Continue. LiteShop shows We turned on: with the tools it turned on.
- Tap Start selling.
For example, a grocery that sells on credit and by weight gets the Credit book, the Weighing scale, Batches & expiry and Barcode labels. A shop that delivers and sells online also gets Delivery, the Online store, Payment links and Courier COD. A shop that answers Yes to repairs gets Repairs & service.
#Add a shop
A shop is one place where you sell. You need at least one shop before you can sell.
When to use: after you create your business, and when you open another branch.
- Open Settings. On a phone, tap More first.
- Tap Business.
- Under Shops, tap Add shop.
- Type the shop Name.
- Type the Default tax rate (%). Type
0if you don't charge tax. - Tap Save.
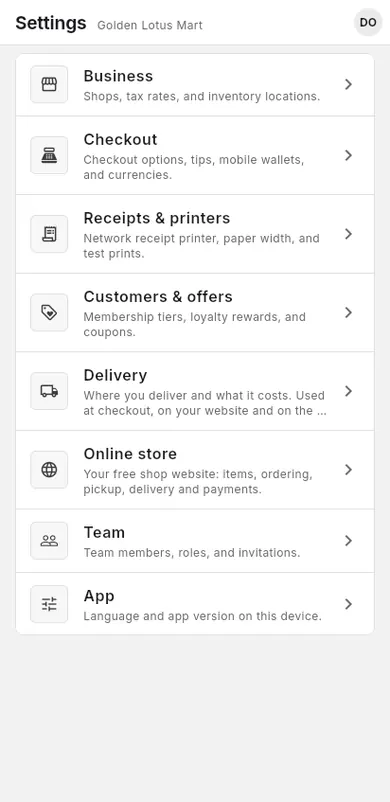
See Shops for more shop settings.
#Invite your staff
Staff who use their own phone or computer get an invitation by email address. Staff who share your register can use a passcode instead (see PINs).
When to use: when a manager or cashier needs their own sign-in.
- Open Settings, then tap Team.
- Tap Invite by email.
- Type the staff member's Email. It must be the email of their Google account.
- Choose a Role.
- Tap Send invitation.
- Tell the staff member to sign in to LiteShop with that account. They tap Accept.
#Roles
Each person has one role. The role decides which pages they can open.
| Role | What they can do |
|---|---|
| Cashier | Checkout, transactions (view and reprint), cash drawer, customers |
| Manager | Everything a cashier can do, plus refunds, voids, price changes, items, inventory, reports and team |
| Owner | Full access, including settings |
When to use: when you invite someone or add a team member.
#PINs
A PIN (passcode) lets several staff share one register. Each person taps their name and types a 4–6 digit passcode, so every sale shows who made it.
When to use: when cashiers share a phone, tablet or PC that is signed in with the owner's or a manager's account.
- Open Team.
- Tap Add member.
- Type the Name and choose the Role.
- Type a Passcode (4–6 digits).
- Tap Save.
More details: PINs and passcodes and Register lock.
#Install the apps
You can use LiteShop in a web browser or as an app on Android and Windows.
When to use: when you want LiteShop on a shop phone, tablet or PC.
- Open https://liteshop.app/download on the device.
- Choose Android or Windows and tap Download.
- Follow the steps on that page.
- Sign in with the same account.
You can also open Settings > App > Get the app. Full help: Apps and updates.
#Language
LiteShop works in English and Myanmar.
When to use: when you want the app in another language.
- Open the account menu (your initials or photo).
- Tap Language.
- Choose မြန်မာ or English.
Everyone can do this: owners, managers and cashiers.
#Your first sale
Once you have a shop and a few items, you can sell.
When to use: to check that everything works.
- Open Checkout.
- Tap an item to add it to the cart. Or type an amount on the keypad.
- Tap Charge.
- Choose Cash and enter the money received.
- Finish the sale. Give the customer the receipt.
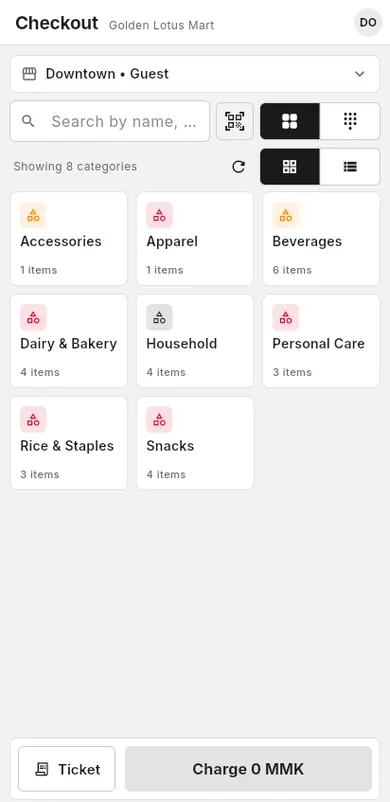
Full help: Library and keypad and Cash. To add items first, see Add an item.