Suppliers & purchases
Add suppliers, make purchase orders, receive stock, keep supplier price lists and see the real (landed) cost of what you buy.
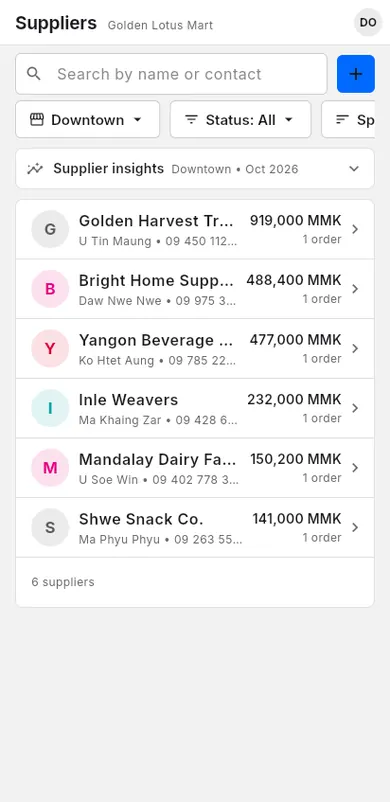
Suppliers are the businesses you buy goods from. This page shows how to save them, order from them, receive the goods into stock and see what each unit really cost you.
#Add a supplier
A supplier record keeps contact details and the terms they give you, such as discounts and days to pay.
When to use: you start buying from a new wholesaler or company.
- Open Suppliers.
- Tap Add supplier. The New supplier panel opens.
- Type the Shop/Company Name.
- Add the Contact person, Phone and Email if you have them.
- Under Purchase terms, fill in what the supplier gives you (see the list below).
- Tap Save.
- Trade discount: the % they always take off.
- Payment terms (net days): how many days you have to pay.
- Early-payment discount and If paid within: a % off if you pay early.
To change it later, tap More on the supplier's row, then Edit supplier.
#Purchase orders
A purchase order (PO) is a list of what you want to buy from one supplier. You can share it as a PDF and receive the goods later.
When to use: you order goods now and they arrive later.
- Open Inventory and tap the Purchase orders tab.
- Tap New order.
- Choose the Supplier.
- Set the Expected delivery date (optional).
- Tap Add item and choose an item. Enter the Qty, and change the List cost or Discount if needed.
- Repeat step 5 for each item.
- Check Costs & terms (trade discount, order discount, Shipping / freight).
- Tap Save draft to finish later, or Mark as ordered when you send it.
- To send it to the supplier, open the order and tap Share PDF.
An order shows its status: Draft, Ordered, Partially received, Received or Cancelled.
Items with variants (sizes, colours): after you choose the item, tick the variants you want and tap Add. Each variant gets its own line, quantity and cost, and is received on its own.
#Fill an order from a quote or receipt
Have the supplier's quote, price list or an old receipt on paper? Let LiteShop read it.
- In a new (or draft) order, tap Scan receipt in Items.
- Take a photo of each page, then tap Read receipt.
- Check what was read. Pick the item for any yellow line, or skip it.
- Tap Fill order. The lines, quantities and prices are added, the supplier is chosen when it is recognised, and the receipt number goes into Notes.
- Check the order and save it.
Scanning uses your monthly receipt scans, like Scan a receipt. The names you fix are learned for this supplier.
#Receive stock
Receiving adds the goods to your stock and saves what they cost.
When to use: goods from a supplier arrive at your shop.
From a purchase order
- Open Inventory › Purchase orders and tap the order.
- Tap Receive.
- For each line, enter how many arrived.
- Type the Supplier invoice number (optional).
- Tap Receive.
If only part arrives, receive that part now. The order becomes Partially received, and you can receive the rest later.
Items sold by weight are ordered and received in kg (or viss) with up to 3 decimals: receive 2.5 kg now and 1.25 kg later. See Buy stock by weight.
Have the delivery note or invoice? Let LiteShop fill the quantities: see Scan the delivery receipt.
Without a purchase order (record a purchase)
- Open Items.
- Tap ⋮ (More actions), then Record purchase.
- Under Purchase details, choose the supplier and the shop that receives the goods.
- Add each item. Enter the quantity, Free qty (bonus units), List cost and any Discount.
- If the item expires, add batches with expiry dates under Batch allocations (see Batches and expiry).
- Optional: type a New sale price (optional) to update the item's selling price.
- Fill in Costs & terms (shipping, other charges, tax, invoice number).
- Turn on Paid if you already paid the supplier.
- Tap Save purchase.
#Scan the delivery receipt
- In Receive items, tap Scan delivery receipt.
- Take photos of the delivery note or invoice, then tap Read receipt and check it.
- Tap Fill received. Each order line gets the quantity on the receipt. Lines without an item are matched to the order by name.
- Lines that differ are marked in yellow, for example "Ordered 10, receipt says 8". Items that are not on the order are listed.
- If the supplier charged a different price, Use the receipt's prices costs this delivery at that price. The order keeps its own prices.
- Fix anything, then tap Receive. The receipt photos are kept with the purchase.
#Edit or void a purchase
You can fix a purchase after you saved it: change the supplier, invoice, terms, notes, items, quantities, costs, charges or what you paid. If it was recorded by mistake or twice, void it.
When to use: you typed a wrong quantity or price, forgot an item, or saved the same invoice twice.
Edit a purchase
- Open Suppliers, tap the supplier, then open the purchase under Recent purchases (or View all). You can also open it from Reports (the purchase slip).
- Tap Edit purchase. The purchase form opens with everything filled in.
- Change what was wrong. You can add items, remove items, or change quantities, costs and batches. The shop can't change (move stock between shops with a transfer).
- Tap Save changes.
- Check the summary: the stock changes (for example "+3 Coke, −2 Sprite") and the money changes. Tap Save changes again.
Only the difference moves:
- Stock goes up or down by the difference. Inventory › Adjustments shows a Purchase edited row for each item.
- What you owe the supplier changes by the difference. Payments you made with Record payment (also from the cash drawer) stay as they are.
- If you paid more than the new total, the extra is a Supplier credit: it comes off what you owe that supplier next.
- The item's cost changes only if this is still the newest purchase of that item.
- If the purchase was received from a purchase order, the order's received quantities and status change to match.
Void a purchase
- Open the purchase from the supplier.
- Tap Void.
- Type the Reason (for example "entered twice").
- Check what is taken back, then tap Void purchase.
A voided purchase stays in the records, marked Voided, with who did it and why. Its stock is taken back (a Purchase voided row in Adjustments) and it no longer counts in totals or reports. Find it under the supplier's purchases, Voided purchases.
#Return stock to a supplier
Send faulty, expired or extra stock back to the supplier. The stock leaves your shop, and the supplier settles it in one of three ways.
When to use: items arrived broken, the wrong items came, or you got more than you ordered.
- Open Suppliers and tap the supplier.
- Under Returns to supplier, tap Return to supplier. (From a purchase: open it and tap Return to supplier.)
- Optional: pick From purchase. The purchase then shows what went back, and you can never return more than it brought in.
- Tap Add item for each item. Set the quantity, the Option for items with options and, if you want, the Batch (else the oldest stock goes first).
- Items with serial numbers: tap Serials and scan or tick the units that go back.
- Pick or type the Reason.
- Pick how the supplier settles it: - Credit on account lowers what you owe this supplier. If you owe less than the credit, the rest is a supplier credit that your next purchases use up. - Money back: type the Amount received and how (Cash, QR Payment, bank …). Cash can go into the open cash drawer (Put into the cash drawer). - Replacement later: the return stays open until the new stock arrives.
- Tap Return stock.
What changes:
- The stock goes down at once. Inventory › Adjustments shows a Returned to supplier row for each item.
- Serial numbers become Returned to supplier (see Serials).
- The supplier's Payable history shows the return; a credit lowers the balance.
- Money back is money in for Business finance; cash into the drawer is a pay in, so the drawer count still matches.
When the replacement arrives
- Open the supplier and tap the open return (Awaiting replacement).
- Tap Replacement received. For items with serial numbers, scan the units that came back.
The stock comes back in at the cost it left with (a Replacement received row). If the supplier sends no replacement after all, tap Credit on account or Money back on the open return instead.
#Supplier price lists
A price list saves what a supplier charges for each item, including cheaper prices for bigger orders and free goods deals.
When to use: a supplier gives you a price list, or prices change with the quantity you buy.
- Open Suppliers and tap the supplier.
- Under Price list, tap Add item price.
- Choose the item (and the Variant if it has one).
- Enter the Unit cost and Currency.
- Optional: add the Supplier SKU (optional), Minimum order qty and Pack size.
- For lower prices on big orders, tap Add price break, then enter From qty and the price.
- For deals like "buy 10, get 1 free", fill in Free goods: Buy and Get free.
- Check the Preview, then tap Save.
When you add this item to a purchase or purchase order for this supplier, the cost is filled in from the price list. The line says "From the supplier price list".
#Landed cost and freight
Landed cost is what one unit really costs you once discounts, free goods, shipping and other charges are counted. The app saves this cost on the stock, so your profit reports are correct.
When to use: you pay for delivery, get free units, or get a discount on the whole order.
The app works it out like this:
- Line cost = list cost × quantity, minus the line discount and the trade discount.
- The order discount is shared across the lines by their value.
- Shipping / freight and Other charges are shared across the lines by their value.
- Tax is added to the cost only if you turn on Include tax in stock cost.
- The result is divided by all units received, including free ones.
| Example | Amount |
|---|---|
| 10 units × 1,000 | 10,000 |
| Shipping | 1,000 |
| Units received (10 + 1 free) | 11 |
| Landed cost per unit | 1,000 |
To see the steps for a saved purchase, open it from the supplier and tap How is this calculated?